Jan and I were asked again this year by the Calgary Public Library to participate in Alberta Culture Days here in Calgary and we presented "We're On Pins and Needles" to full classes at two libraries in the city.
We had the participants make a pin cushion using a mason jar and used two different techniques to embellish them.
The first was embossing on velvet, a technique used from early days to embellish the inside of an embossed leather frame photo case holding a tin type photo. These were certainly in use since the days of the American Civil War and would have been carried by soldiers and others to remember their loved ones.
This technique would have used a metal roller to emboss the velvet. We are using a modern day version, using a red rubber stamp.
Rayon acetate is the best velvet to use, however, this technique also works on cotton velveteen. Try other types of velvet as well and a good source of good velvet are clothing items found at thrift shops.
 |
| Tin type of my grandfather and great grandmother Hatchell, circa 1884. |
The second technique that we used was embroidery in a colour that would enhance and not compete with the embossed velvet. We used french knots and stars.
Supplies:
·
6” square of Velvet, rayon/acetate
is great to use, but is hard to find. You can also use cotton velveteen with
decent results, depending on your rubber stamps
·
Rubber stamps, clean images with
good lines
·
Spray bottle with water
·
Iron
·
Wide mouth mason jar with ring and
snap lid (250 ml)
·
Glue or glue gun to add the circle
of felt onto the bottom side of the ring to finish it off.
·
Stuffing - polyester fibre fill
·
Matching embroidery thread, you
want to add texture with your embroidery, not take away from the embossed
image.
·
We used # 12 perle cotton. 4"
or 5” embroidery hoop.
· Strong thread to gather velvet..
Directions:
1. Fold your square of velvet in half both ways and pinch
to determine the centre of the square. Mark with a pin, if desired.
2. Select your stamp of choice, placing it right side up
on the ironing mat. Lightly spray with water. Place your square of fabric, plush side down and centered on your rubber stamp and
lightly spray with water. Remove pin, if used
3. Carefully place the iron on top of the stamp and
velvet and press hard for about 10 seconds. Do not move the iron. Lift the iron
to see that you can see the impression of the rubber stamp on the back side of
the velvet. If it looks good then remove the velvet. If not, press again for a
few seconds.
4. Place embossed velvet into the embroidery hoop. Do a
random combination of French
Knots and Stars around the embossed image.
5. Rough cut your velvet square into a circle, by
trimming the corners. Do not remove a lot of fabric, as it is necessary to have
enough to cover the edges of the lid by at least a 1/2” all around, after the
stuffing is inserted.
6. Thread a needle with a doubled, strong thread and do a
gathering stitch around the circle about 1/4” away from the edge.
7. Gather up the velvet to make a pouch and place your
stuffing into the velvet trying to make a nice round shape.
8. Place the metal lid into the velvet, with the printed
top of the lid next to the stuffing, and gather up tightly, adjusting as
necessary. Your fabric will cover 1/2” to 1" of the bottom of the lid
all around. Knot and cut your thread.
9. Place the outer ring over the gathered piece. Make any
adjustments necessary to centre your embossed motif.
10. Cut a circle of felt slightly smaller than the lid and
glue/glue gun to the back of the gathered velvet and exposed lid.
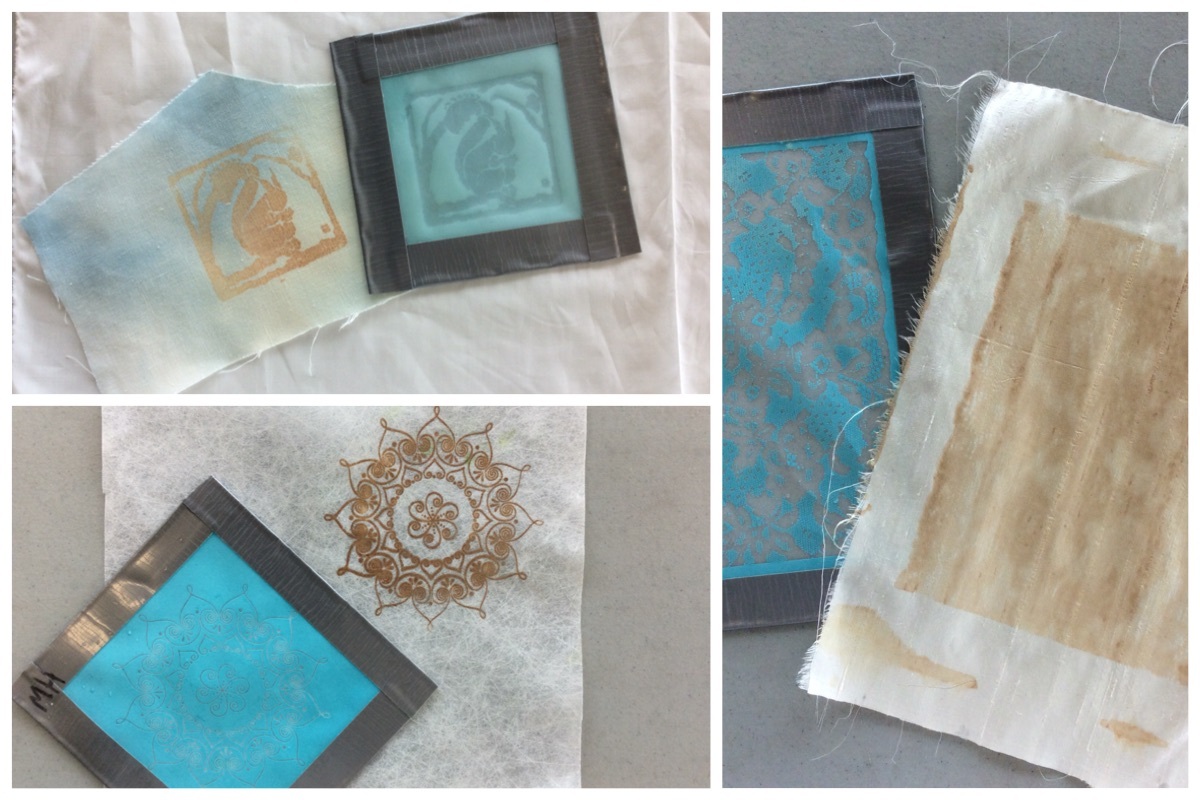
 |
| Steps 1 - 3 |
 |
| Steps 4 |
 |
| Steps 5 - 10 |
Finish off with a pair of folding scissors, pins, needles and thread and you have a great gift for that sewing fanatic in your life. After all Christmas is coming....