 |
| Vintage Felt Stocking circa 1950's. My first and only stocking. Thanks for joining us at FOG again this year. |
Wednesday, 14 December 2016
Merry Christmas
Sunday, 18 September 2016
FOG Tuesday Collograph Printing Plates
To start off our new year at FOG Tuesday we are doing a two part
session. Part 1 in September is the making of Collograph Printing Plates and on FOG Tuesday in October we will be
printing Collographs with the plates.
A collograph printing plate,
simply explained, is the creation of a collage of materials with interesting
texture and relief on a rigid substrate and the resulting monoprint collograph is created when you apply
inks or paints to the plate surface and print onto another surface such as
fabric or paper.
 |
| Little works of art in themselves. TL Corrugated cardboard, TR lace, buttons & cheesecloth. Bottom Lace Doily |
The supplies for making a collograph plate are quite simple:
- A rigid substrate: matt board, two layers of cardboard glued together, MDF
- White glue or glue gun
- Paint brush to apply glue and varnish
- Liquitex™ gloss varnish
- Found objects: feathers, netting, lace, buttons, grunge board, foam sheets, corrugated cardboard, toothpicks, elastics, cheesecloth, puzzle pieces, washers, grunge board scrapbooking pieces, cereal box cardboard
Apply a thin surface of white glue to your substrate and create your
collage with your found objects. The only real rules you need to follow are:
If your items are a bit heavier, you may want to use the glue gun to adhere them first, and then do a layer of white glue.
- ensure that all items you use for your collage are the same height and not too deep,
- leave some open areas around your objects, unless you are doing an overall textured pattern on your plate, for example lace or cheesecloth,
- if you are using letters, make certain that you glue them on mirror image.
If your items are a bit heavier, you may want to use the glue gun to adhere them first, and then do a layer of white glue.
 |
| The two items that I used for my first plate were not even so did not produce a good print. Also, the felt leaves, though covered in the gloss varnish, did not take the paint very well. |
Once the collage is completed you want to let them dry thoroughly (we
set ours out in the sun to dry), though you could leave overnight or use a hair
dryer to speed up the process.
 |
| Fruits of or labour drying in the sun. |
When the plates are dry, apply two thin layers of the gloss varnish to
the front and back of the plate as well as sealing in the sides, especially if
you are using cardboard as your substrate. The coating of gloss varnish seals
all surfaces and provides a protective layer once you apply the wet medium you
are using, paint or ink, and protects your plate for additional uses.
 |
| Great texture. |
 |
| More texture and letters placed mirror image. |
 |
| Left Zipper pieces and two layers of grunge board to even the layers. Top Right Adhesive foam shapes. Bottom Right Simple shape cut from cereal box cardboard. |
More about our printing experiences in October! Stay tuned…
 |
| Top Simple cardboard plate, printed on fabric. Bottom Mirror image grunge board scrapbooking shapes. |
Monday, 23 May 2016
FOG Tuesday - We All Felt It!
We have worked with commercial felt in past sessions, but in
our session in May we focused entirely on commercial felt squares and the
multitude of ways it could be manipulated, embellished, stitched and most
importantly, how it distressed/melted with our heat guns.
Felt comes in a variety of colours and also as printed or
embossed felt. The printed felt is quite fun to use and adds an element of
extra colour to the piece. We did not try embossed felt, but it is available at
Michael’s here in Canada. If you are a little more on the diva side, felt also
comes flocked and glittered.
 |
| Printed felt, left. Hand cut petals of printed felt, heat distressed and assembled with a brad. Add a pin backing and you have a great brooch to wear. |
 |
| Printed felt, stitched and heat distressed. |
One of the ways we altered the look of the felt before
stitching and melting was with the use of commercial and handcrafted stencils
and stamps.
 |
| Jan, commercial stencil, left. Printed with metallic paint, right. |
 |
| Gillian, several techniques on all pieces. |
 |
| Variations on a theme, Commercial flower stencil. Couched yarns. |
 |
Top, felt with added painted fusible web pieces, left,
and heat distressed, right.
Bottom, hand crafted stamp, glue gun glue on a
piece of foam core, left, printed felt, middle and heat
distressed, right.
|
 |
| Glue gun glue on foam core, left, stamp cut from a shoe insole, top right. Bottom right, stamp made from commercial, sticky backed foam stickers. |
If you want to maintain some structure with your piece before
melting, you can stitch on the felt beforehand. This ensures that your piece
will not fall apart. We tried both cotton and polyester threads and both seemed
to work.
 |
| Diane, Stitched and distressed. |
 |
| Nan, Stitched and distressed. |
If you own, or have access to a Sizzix™ or similar die
cutting machine you can cut shapes with your Sizzix™ and then heat distress
them with your heat gun. Both craft embossing and industrial heat guns work
well, you just need to test beforehand how much heat you need to use to melt
your felt.
 |
| Leaves cut with a Sizzix die and then heat distressed. |
Many synthetic fabrics will distress/melt with a heat gun.
While we mostly focused on the poly felt, by Kunin™ and Creatology™. Both are widely available at Michael’s and
most of the dollar stores. Karen did try some polar fleece and it seemed to
work very well.
 |
| Karen, adding elements to a denim piece, left. Heat distressed polar fleece, right. |
Another way to embellish your piece is to print an image onto fusible web and then iron it onto your felt. Then you can be as creative as you want with stitching and heat distressing.
 |
| Chris, Image on fusible web transferred by ironing to the felt, left. Stitched and heat distressed, right. |
While we were using the 9” by 12” inch squares of felt, I guess
they really should be called rectangles J, felt
is also availed in larger precut pieces and by the yard/metre off the bolt at
your local fabric store. Just think of the possibilities with a very large
piece of felt.
ECO Alesrt! You should also feel
good about using felt as a crafting item as it is mostly made from 100% post- consumer recycled and BPA-free plastic
bottles and produces a high-quality fibre at a very modest price.
Until next time, have Fun with Felt. Meredith and Jan
Tuesday, 3 May 2016
FOG Tuesday – We’ve Found Our Marbles
At the April session of FOG we found out just how easy it is
to marble on fabric and paper, both having the same prep for a wonderful
result.
We tried two different methods of marbling, one using a
thickened medium in our trays and the other using foam shaving cream. It needs
to be the foamy kind, not gel, to work. NOTE: It is helpful to know some basic
colour theory to understand how your colours will mix.
Prep for the first technique. Thickened Carrageenan or MarbleThix

Using carrageenan (available
at art or health food stores) or MarbleThix™ by Delta, mix the quantity of
dried product to warm water, MarbleThix™ used one TSP of powder to one quart of
water. This is best done at least 6 – 12 hours before using. MarbleThix™ is the
one that I used. Some did this in a blender; I just did mine by hand in a
container. Unfortunately, MarbleThix may no longer be available. We purchased
ours from a local dollar store
The second step for prep is to mix up an alum mixture to
soak your fabrics and papers. Alum helps the colour to adhere to your product
and improve on print quality. Fabric should be soaked
in 2 TB of Alum dissolved in 1 quart of water. Paper should use more Alum - 4
TB in 1 quart of water. Both items need to be dipped in the solution and
then dried before marbling. Alum may be purchased in a health food store or in
the spice department at your local grocery store.
Both alum and carrageenan are
used in the production of food products so are very safe for use, even for
children.
Lastly, you need to choose the type of inks, dyes or paints
that you will use to float on the thickened mixture in your trays. We found
what best worked for us by trial and error. We tried alcohol inks, different qualities
and brands of acrylic paints, Liquitex Acrylic Ink and Dye-na-Flow™ by Jacquard.
I tried alcohol inks that sank to the bottom right away. I
did not try acrylic paint and found that my best results were with Dye-na-Flow™.
It is used on both natural or synthetic fabrics and papers.
Now comes the fun part.
Pour your thickened mixture into a tray. The mixture should
be clear in colour. Start by dropping your colour onto the surface –
making blobs of colour and then dropping additional colours into that blob, giving some
interesting results.
 |
| Jan's pieces The middle one was Liquitex acrylic ink.Right and Left are Dynaflow. |
Next, drag a skewer or other tools through the blobs and
your pattern starts to appear. Once you are satisfied with the results, place
your dry, alum soaked fabric or paper onto the surface of the newly coloured
mixture. With fabric, it helps to hold the two sides and drop in the centre of
the fabric first, then the sides. Lightly pat the surface of your fabric or
paper trying to get all the colour on the surface to adhere.
 |
| Jan's - on paper. |
Once that is done, carefully pick up your piece from the
surface and put aside to dry. If there is any colour left on the surface, run a
piece of paper over it, leaving it clean to do your next design.
 |
| Meredith - the three stages of marbling. Top Left -Drop colour onto the surface. Top Right - Drag through the paint. Bottom - Finished print, this one is on Dupioni Silk |
 |
| Meredith - the three stages of marbling. T0p Left -Drop colour onto the surface. Top Right - Drag through the paint. Bottom - Finished print, this one is on cotton. |
 |
| Meredith - finished fabric.Top left is the Dupioni Silk, the other three are cotton. |
Prep for the second technique. Shaving Foam
Spray the foam shaving cream onto your surface or tray and drag
a straight edge across the surface to create a smooth even surface. (If anyone has found an unscented shaving foam, please share the brand name with us.)
Next drop your colour onto the surface of the foam and drag
a skewer or other tool through your drops of colour to create your pattern.
Once you are satisfied, place your fabric or paper onto the surface, tap it
down and then pull your print. Lay the print on a solid surface and using a
straight edge, drag the remaining shaving foam from your print.
Inexpensive acrylic paint, food colouring and inks are three
good products to use on the foam. The foam can be reused several times, however,
if colour is left on the foam it may affect subsequent colours that are layered
on top.
 |
| Diane - Foam print on paper. I need to get the finished result and post. |
 |
| Karen - finished pieces, right, all on glossy photo paper. Bottom left, a dragging tool that Karen made. Top left - shaving cream tray. |
Have fun with this, it is quite addictive. I’m certainly
ready to make additional pieces and have purchased a larger foil tray to that I
can do some larger pieces.
 |
| Fruits of our labour. |
As always, we enjoy your feedback. Cheers, Meredith and Jan
Monday, 11 April 2016
Dabbling with Derwent Inktense Pencils and Blocks
In February we delved
into the world of faux batik, using
Elmer’s Blue Gel Glue as the wax. The light colour blue was an advantage,
especially on white fabric. Several of us drew our designs freehand, while
others traced over a design and added or subtracted lines as necessary. White
cotton was the fabric of choice, but Karen tried her hand using denim and it
turned out very well.
 |
| Elmer's Blue Gel Glue - Faux Batik |
 |
| Faux batik, inktense colouring and final stitching. |
 |
| Leslie's Poppy Head Photo and Faux Batik in progress. |
Once
the designs were drawn there was a waiting time for the glue to dry and then we
coloured the designs using the Derwent
Inktense Pencils. These are quite pricey, but a sharp eye on Amazon or Ebay
can get you some decent pricing. These pencils are quite amazing, with rich
vibrant colour.
“Derwent
Inktense pencils are our best watercolour pencil ever! You can use them dry but
mix them with water and WOW! the colour turns into vibrant ink. Once it’s dry
the colour is fixed and you can work over the top of it, and, because it
permanent it’s great for using on fabric such as silk and cotton!” Derwent website.
Once the glue and
pencils are dry, you wash out the glue, leaving white lines similar to a batik.
 |
| Faux Batik, colouring and lines, final stitching. |
 |
| Faux Batik, Inktense Pencils, experimentation with fabric medium and water. |
 |
| Karen's denim piece |
In March we continued
with a different Derwent product, their Inktense Blocks, equally as gorgeous in
colour with a slightly different application method. Our goal was to enhance
some of our faux batik pieces from February and create some new pieces in March
with free motion machine quilting and use a variety of rubbing plates or
freehand drawings and colour with the inktense blocks.
 |
| Rubbing plate, rub Derwent Inktense Blocks over the cotton, free motion machine stitched. |
 |
| Free motion stitching, inktense blocks and pencils, detailed experimentation notes. |
We had not done any work
with sewing machines before so it was great to add another tool to the toolbox
and explore this for use in future mixed media and fibre projects.
 |
| Jan stitching - free hand drawing with derwent inktense blocks, free motion machine quilting. |
In both sessions, in
addition to the Derwent products, there was much experimentation with the use
of water and fabric mediums to see if there was any magic formula that made the
colour extend further, be brighter or how they moved on the fabric.
I tried my hand with the inktense blocks and working with old cotton felt, a dryer sheet, machine stitching and a heat gun. Haven't used that in a while. I quite liked the effect, but will use synthetic felt next time to add an additional distressed look.
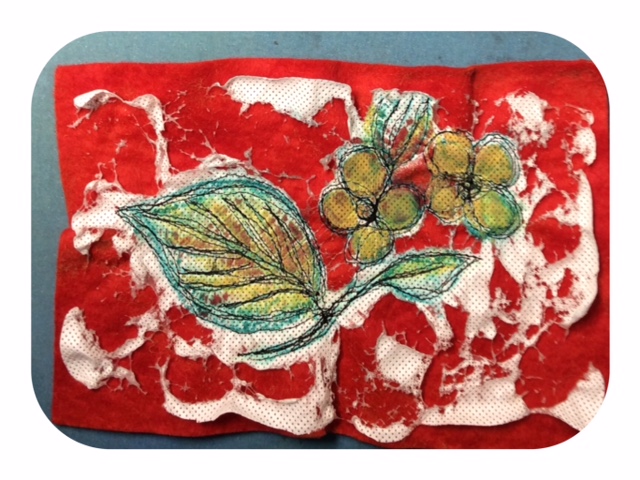 |
| Free hand drawing on dryer sheet with inktense blocks, free motion stitching, heat distressed on vintage cotton felt. |
 |
| Free motion stitching on dryer sheet and heat distressed on vintage cotton felt. Where you can see the yellow brown colour, the heat gun turned the inktense blocks that colour and the colour did not allow the dryer sheet to distress. |
Working with these products was a lot of fun and I'm certain that we will be revisiting our use of the sewing machine again with the group.
Sunday, 24 January 2016
Ah, Velvet...so plush, lucsious and meltable!
 |
| Knotted Braid |
Just for a change, our warmup embroidery was changed slightly - to a knotted braid. This is the way many have made friendship bracelets over the years. It can be used in embroidery as well and everyone was able to create a colourful braid sample.
Great start to the day!
 |
| Velvet embossed with rubber stamp |
After this, we moved on to embossing velvet. Velvet can simply be embossed with a hot iron, and a rubber stamp. Just spray the stamp and place the velvet, plush side down onto the stamp, and iron it (without steam) for about 30 seconds. Different types of velvet will produce differing images - the best type being rayon acetate velvet.
 |
| Pigment ink embossed velvet |
Of course, we took this further, as an embossed image is not permanent. We used pigment ink pads to ink the stamp and then embossed the velvet. The image is now permanent and you can add a contrasting colour to the velvet to enhance the image. We also had some information from the net to use paint, but this really damages your stamp.
We used rubber stamps, but clear acrylic polymer stamps will also work, as long as they are the high quality ones (generally made in the USA). The cheaper ones will melt, so don't use those!
 |
| Pigment ink stamp |
 |
| Pigment ink stamp |
 |
| Pigment ink stamp |
And, finally we had to try yet another technique.......
 |
| Acrylic Paint & soldering gun |
Using a stencil, we used acrylic paint on the velvet and then used a soldering gun on the painted sections of the velvet to add some additional texture.........lovely results!
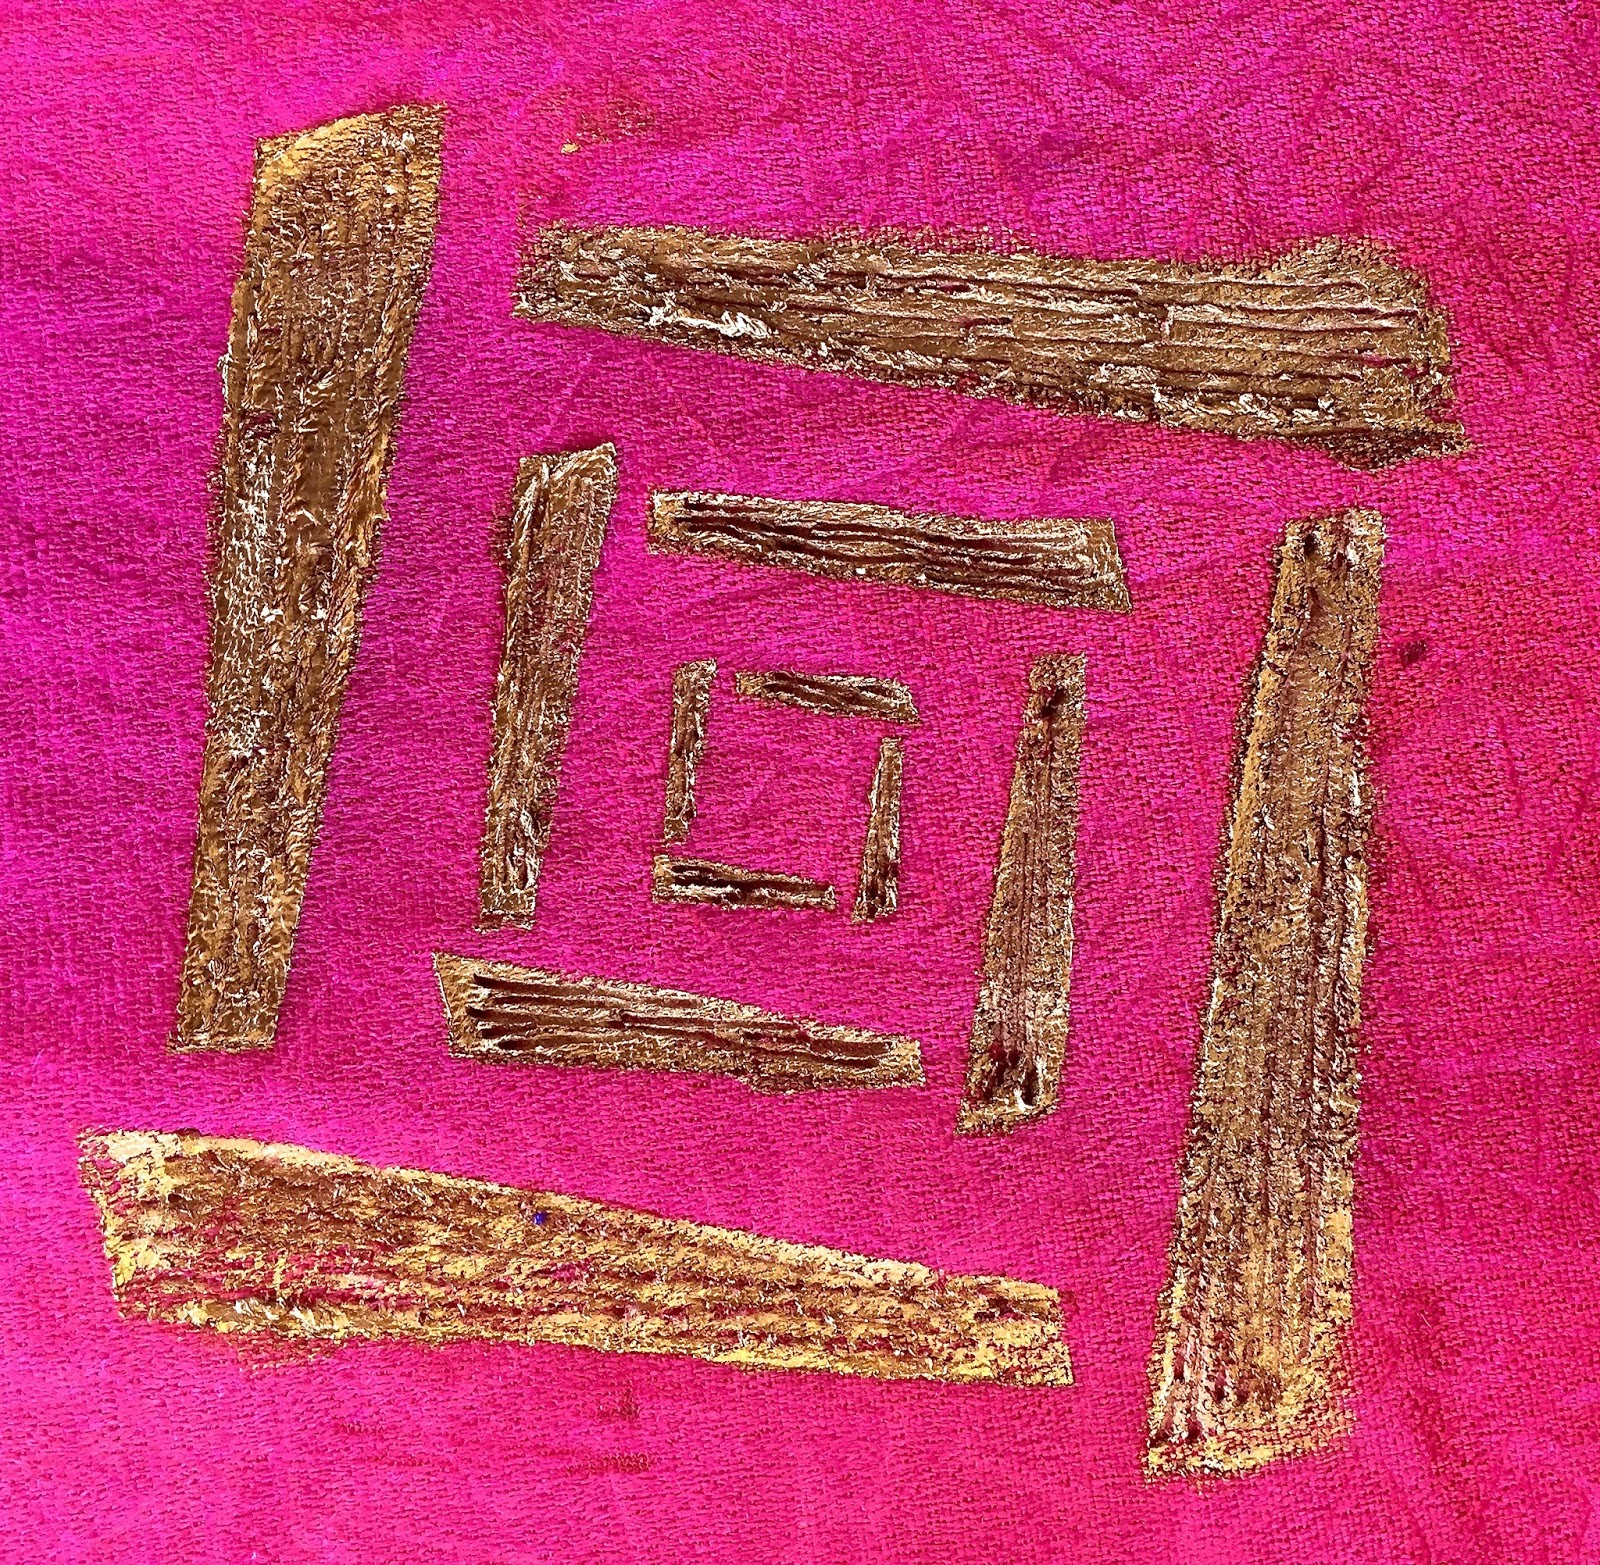 |
| Acrylic paint and soldering gun |
 |
| Velvet stencilled with acrylic paint |
Some of us just liked the look of the stencilled velvet with no further actions. Velvet seems to look great no matter what you do to it. It retains that rich luscious texture!
 |
Subscribe to:
Posts (Atom)